
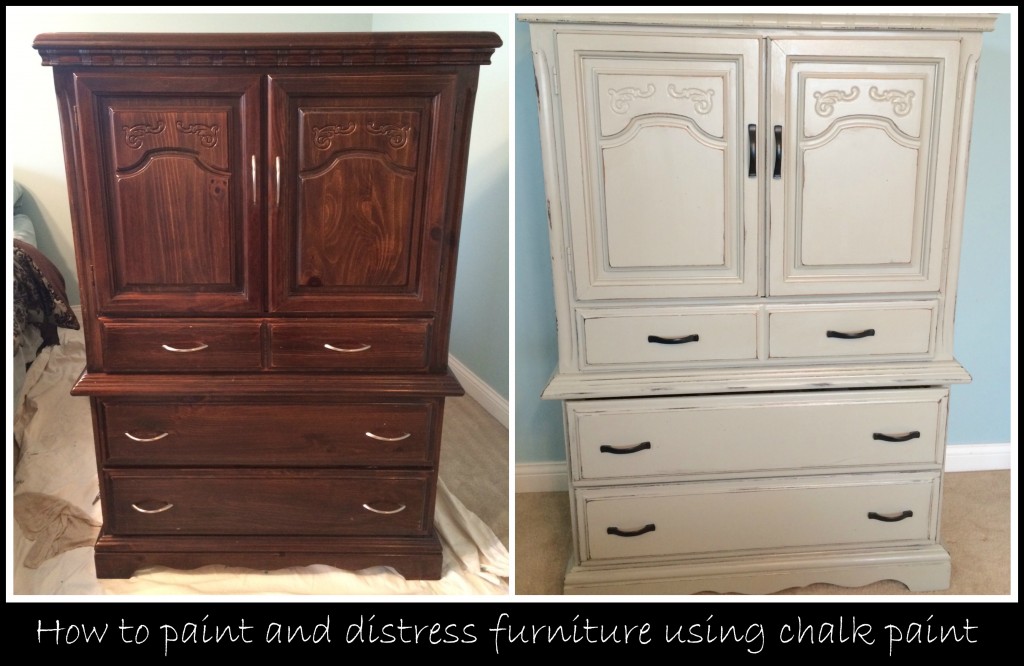
Not sure if you have heard of Chalk Paint before, but it is my new favorite thing! I was completely clueless about how amazing this stuff is and if you google it you will find it is all the rage right now. I was contacted by Rose who owns The Sewing Loft to see if I would be interested in trying it out so I could share my experiences with all of you. I was a little hesitant because I am not a very crafty person, but Rose assured me it was very easy to work with so I agreed to test it out!!
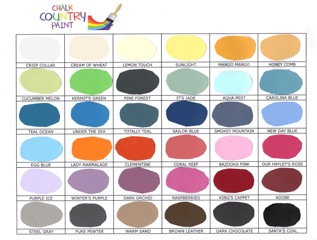
There are several different brands of Chalk Paint and The Sewing Loft carries Chalk Country. It’s an American made paint that is low VOC and eco-friendly. The low VOC make it virtually odorless so you can paint anywhere! No need to carry those heavy pieces of furniture outside!
There is also no need for sanding or priming with this paint so you can get a small project done in one morning or afternoon! This was music to my ears being 9 months preggers. I needed EASY!
I had 3 pieces of furniture that I wanted to update in my bedroom. Two of the pieces was the hubs from when he was growing up. I literally cannot stand them, but our bedroom will be the last thing to update and it works for now. We have been going room to room changing things in the house and getting new furniture, but it takes time and money so mama has to wait on the nice bedroom set! The other piece I got from a neighbor who was just going to throw it away. I had it in the basement until now and decided to use it as a second night stand. Since I am super addicted to anything gray at the moment, I chose the Steel Gray color.
Here is the look of the initial pieces:
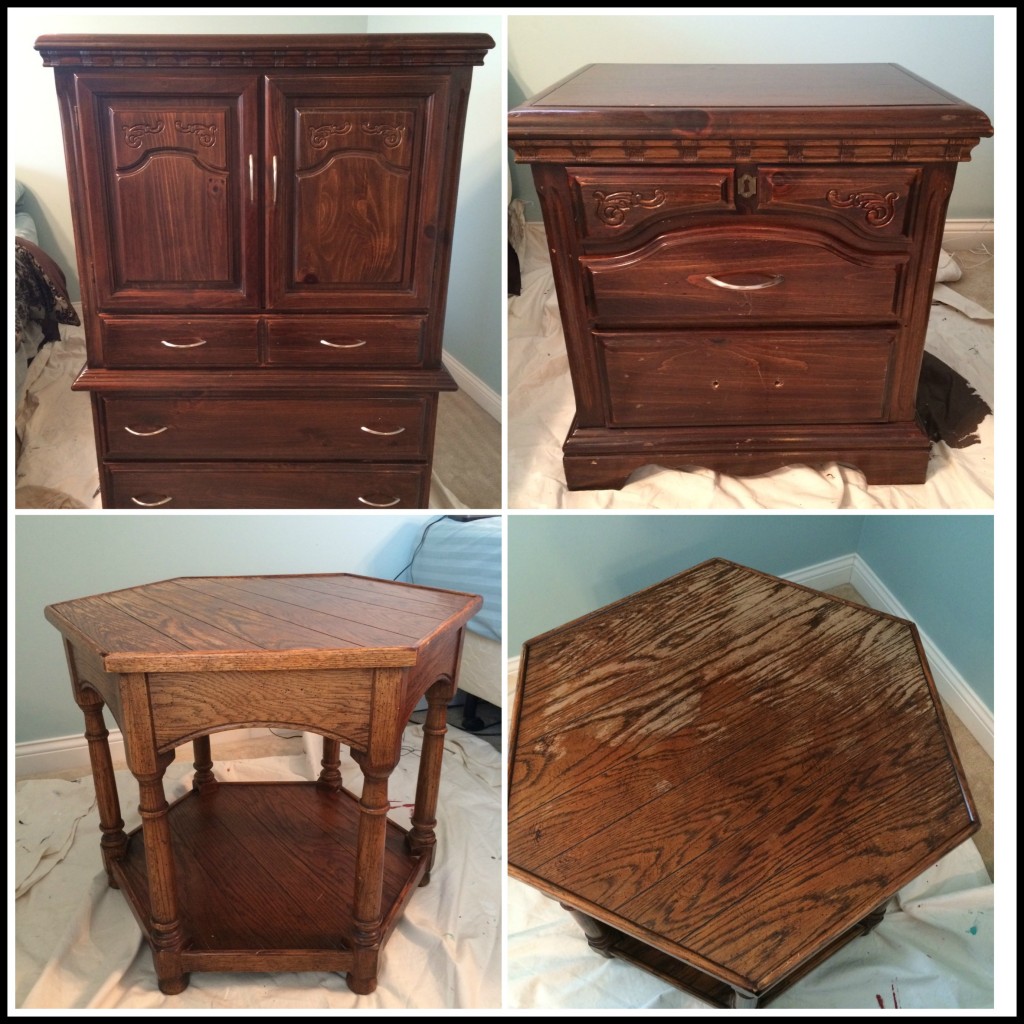
I know! Nasty right?! These could def use some TLC! What is awesome about the low VOC is that I was able to have the hubs put the tarp down right in our bedroom to paint these. NO sanding required. Just wipe the furniture down if it is dusty and then paint! There are so many different options of paint colors you can use and you can even mix colors if you want to create your own unique look. You don’t need a lot of paint on your brush. I mean this… we had a quart size can and were able to paint all three pieces twice and I still have a decent amount left in the paint can.
Here is what they looked like after two coats:
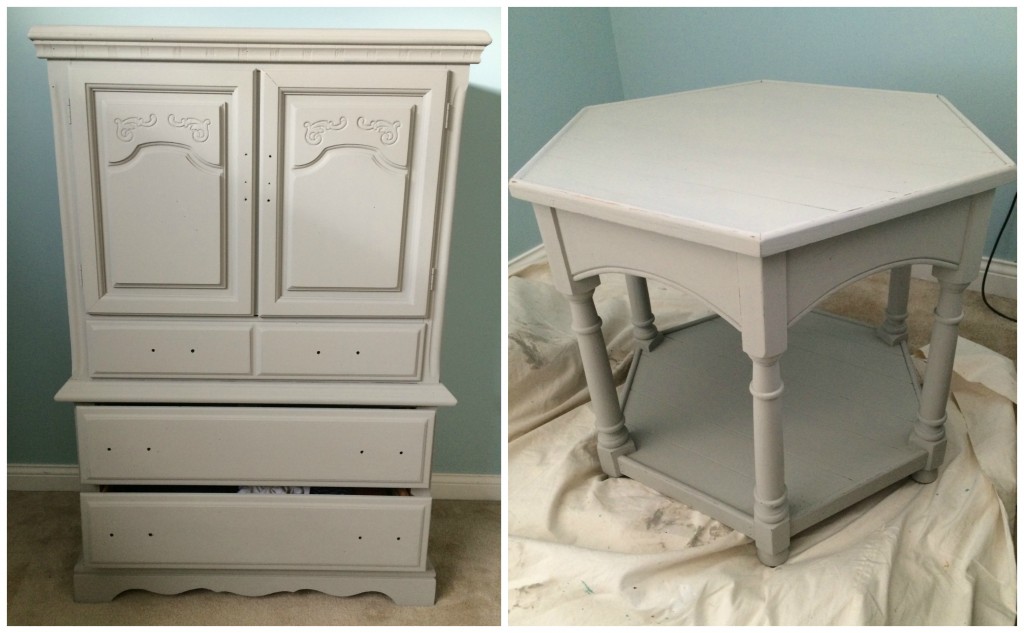
How much better do these look??!! I was shocked at the difference the refurb made and WISH we had done this years ago! It dries very quick and it only took us 2 hours to paint two coats on all three pieces.
Now on to the fun part. You could leave your furniture like this, with a fresh coat of paint, OR you could distress it! I LOVE the look of distressed furniture and figured why not try it out on this project. You really can’t go wrong because if you take off too much paint with your sand paper, you just paint over that and start again. There are different grades of sand paper so base the fineness/ gritiness of the paper on how distressed you want the piece to look. Start with all the edges and then after you have the feel for it, you can do some of the flat spots if you would like. We took a damp cloth to the distressed areas after sanding to get all the dust off. This took us about an hour to distress all 3 pieces.
Your last step will be to seal it. I looked at so many tutorials on this and a lot of the pros love the Wax. The wax comes in clear, light (yellowish), rugged(brown) and jacobean (black) so you can change the color of the paint with the wax which I thought was a cool concept. This seemed a bit more time-consuming and there seems to be a lot of user error with the wax so we went with polyurethane. It goes on clear and you can paint it on very easily. This does contain higher VOC and has a strong smell to it. There are different types and brands that are less volatile so ask the clerk at Home Depot or Lowes for their opinion. We ventilated the room for a good 24 hours during and after doing this step. This took my hubs about an hour to complete all three pieces.
Here is the furniture after distressing and sealing:
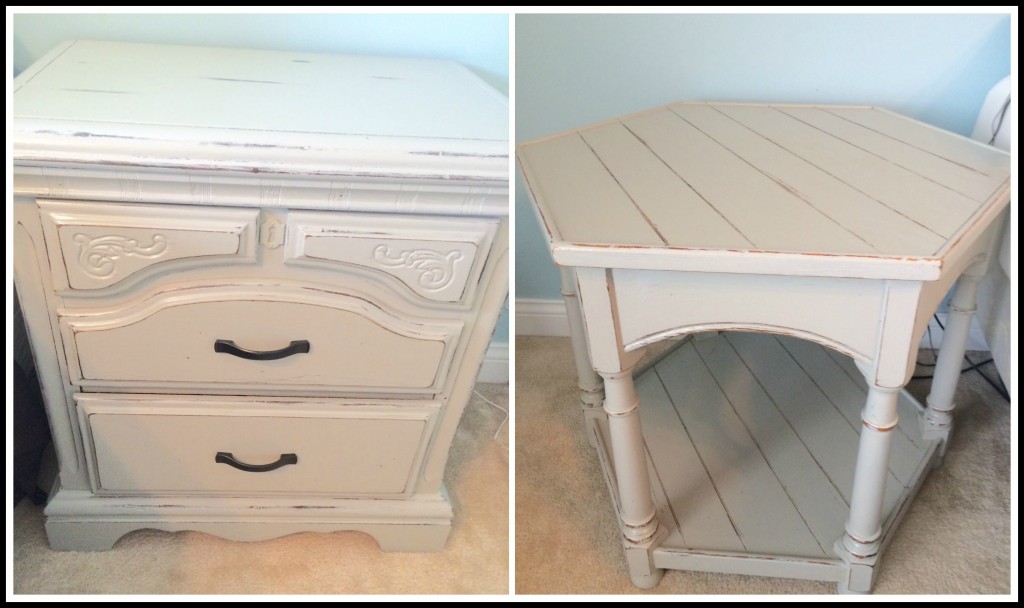
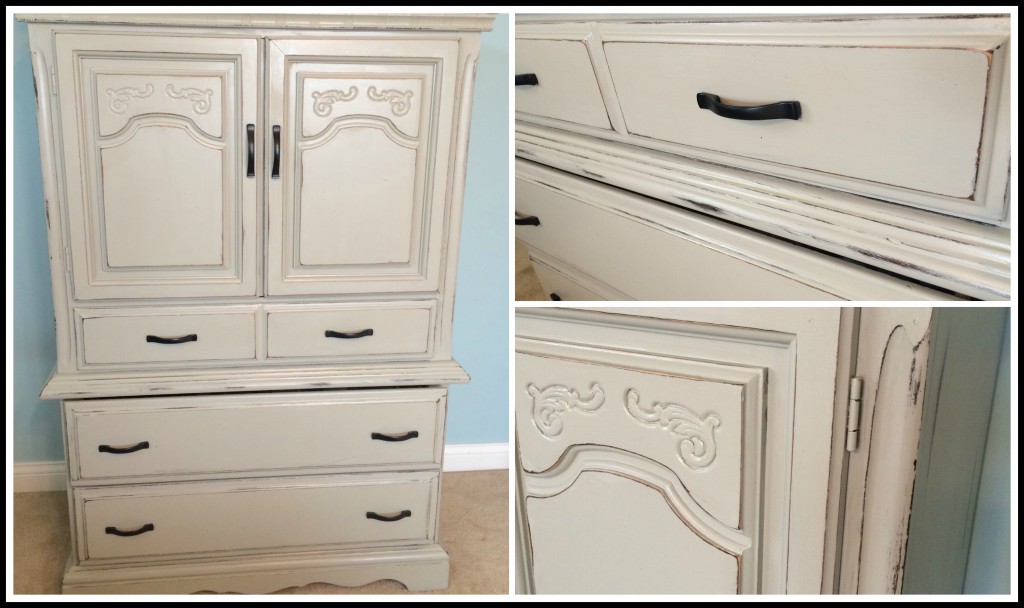
I am SO happy with the finished product! Every time I walk in the room I can’t even believe what a huge difference it has made. No more drab, dark and dingy furniture. It now looks modern and chic! We brought out the distressed areas with new handles. You can always find nice ones at the hardware… look at the clearance first as you can get some for under $1 a piece!
Overall, I LOVE this stuff! My hubby did most of the work since I am big preggers, but I did watch him throughout the project and it seemed reasonably easy and only took him about 4 hours total which really isn’t bad for 3 pieces of furniture. You could use this on second-hand store items like ugly brass candlesticks, chandeliers, old lamps, picture frames and just about anything else. The possibilities are endless!
Rose is offering classes that teach the basic technique of painting, distressing and waxing single color projects. More advanced classes will be added later so check out her website and Facebook page for more information and to get the creative juices flowing! The paint comes in 8oz and quart size, the 8 oz is $14 and the quart size is $28. If you choose the wax, it is $28 for the container.
Have you used Chalk Paint before? I would love to hear your experiences with it!
I did receive the paint for free to try so I could share my experience with you, however, all opinions and ideas are my own! You can read more about my Disclosure & Disclaimer Policy here. Feel free to contact me with any questions! Thanks for reading!


{ 19 comments… read them below or add one }
Oh this is interesting! Must admit it's my first time to hear about chalk paint. I'll surely look for one soon and try this out for my next furniture project. Thanks for this!
This is fantastic, I have bought some chalk paint the same colour that you have used. I painted a child's chair thats very old and my son loves it! A lovely colourful vibrant pillow to add some colour and it looks good as new :)
I highly recommend a clear varnish to protect the furniture and keeps it waterproof and finished!
Monica
Mama Bee Simple http://mamabeesimple.blogspot.com
Great tip!Sent from my iPhone
These look fantastic! We also experiment with Chalk Paint over at Soft Touch Furniture with our residential repair & refinishing products.
Awesome and thank you!Sent from my iPhone
That's nice one.
Thanks!Sent from my iPhone
Nowadays, Chalk paint is the best for painting the furniture.Paint is easily applied to the interior and exterior surfaces of furnitures and proper mix of black color will make more better combination.
Chalk paint is made by use of latex paint , cool water , baking soda and unsanded grout.You can also add a less or more of plaster paris according to your requirement.
Love your transformation. Provence is one of my favorite colors in the ASCP line! Nice job!
Thanks so much! I honestly can't believe how great they turned out!Motherhood Support <a href="http://www.motherhoodsupport.comwww.motherhoodsupport.com<br />FacebookTwitter You TubeInstagramPinterest
Chalk paint is made by use of latex paint , cool water , baking soda and unsanded grout.You can also add a less or more of plaster paris according to your requirement
thanks i want paint my office furniture
i will do this
very nice designs
Thanks!Motherhood Support <a href="http://www.motherhoodsupport.comwww.motherhoodsupport.com<br />FacebookTwitter You TubeInstagramPinterest
So weird. I was just searching for information about this stuff and you popped up. You must be doing something right. Thanks by the way, this really answered some questions I was throwing around in the back of my mind.
Amazing post. Great idea. Thanks for sharing https://goo.gl/d4wmnS
Thanks!Motherhood Support <a href="http://www.motherhoodsupport.comwww.motherhoodsupport.com<br />FacebookTwitter You TubeInstagramPinterest
This is the amazing recipe.